How big can a cap embroidery design be?
By BobbinBot. Published .
In our settings a cap front takes up to about 100 mm wide and 55 mm tall, and a beanie about 75 by 45 mm. Height is the limit most designs hit first, so wide designs fit caps better than tall ones.
Our cap and beanie limits
These are the sizes our engine checks against, from config/items.json. A design taller than the item allows gets a yellow verdict with the height in the reason, so you see it before you pay.
| Item | Widest | Tallest | Stabilizer | Needle |
|---|---|---|---|---|
| Cap front | 100 mm | 55 mm | Tear-away cap backing | Sharp needle, 75/11 |
| Beanie cuff | 75 mm | 45 mm | Cut-away stabilizer, with water-soluble topping on chunky knits | Ballpoint needle, 75/11 |
A tall design and a wide design
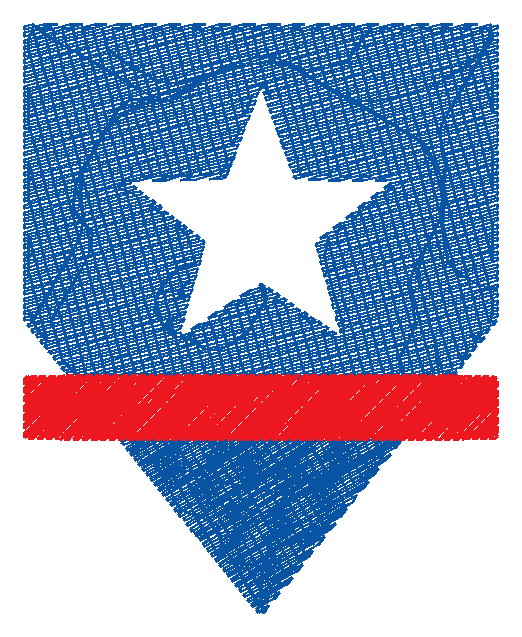
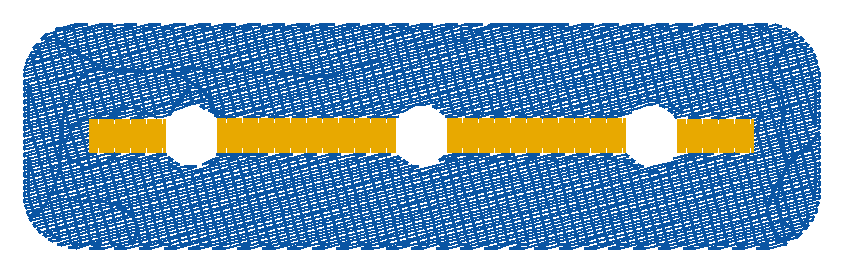
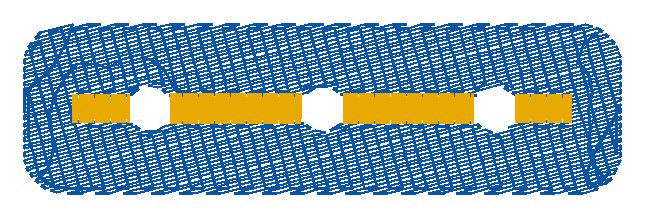
We ran two of our own pictures through the engine for a cap: a tall shield at 60 mm wide, and a wide badge at 100 mm wide. Then the badge again at 75 mm on a beanie.
| Design | Came out | Stitches | Verdict | What the check said |
|---|---|---|---|---|
| Tall shield, cap | 59.2 × 73.6 mm | 4,271 | yellow | It is 74 mm tall. A cap front fits about 55 mm, so make it smaller. |
| Wide badge, cap | 99.4 × 28 mm | 3,415 | green | Nothing to change. |
| Wide badge, beanie | 74.6 × 21.2 mm | 1,900 | green | Nothing to change. |
The shield is only 60 mm wide, much narrower than the cap allows, and still too tall. The badge uses the full 100 mm of width and passes, because it is only 28 mm tall. On a cap, the shape of the design matters more than its width.
Check your design on a cap
Upload your logo with the cap picked. The verdict tells you if it is too tall before you pay, and your first design is free.
Why height is the limit
A cap front is not flat. It curves up from the brim toward the crown, and a structured cap has a stiff seam down the middle. The area the needle can reach cleanly is a band above the brim, which is why our hooping note for caps says to keep the design low and centered on the seam.
Commercial machines sew caps on a cap frame, and Tajima's own instructions for caps include rotating the design 180° and tracing it first to make sure the needle does not hit the frame. Our setting for home machines is to hoop the front panel flat with a cap backing, or to use the machine's cap frame if it has one.
Getting a design to fit a cap
- Make it wider rather than taller. Put a logo and its text side by side, not stacked.
- Measure your own cap: the space above the brim varies between styles.
- Keep the design centered on the front seam, and keep thin details away from it.
- Use bold shapes and short words. Small text on the curved front is harder still; see how small text can be.
- For a beanie, fold the cuff up and hoop it flat without stretching the knit.
- Want raised letters? Read what 3D puff can really do first.
Questions
What size should a cap embroidery design be?
In our settings, up to about 100 mm wide and 55 mm tall for the front. Many good cap designs are much wider than they are tall.
What size is a beanie embroidery design?
Up to about 75 mm wide and 45 mm tall on the folded cuff, in our settings.
Can I embroider a cap on a home machine?
Often, by hooping the front panel flat with a cap backing, or with a cap frame if your machine has one. Check your machine's accessories.
Why does my design not fit on a hat?
Usually it is too tall. A cap front has much less height than width, so a tall logo has to shrink until it is too small to read.
What stabilizer do caps need?
We use Tear-away cap backing for caps, with a Sharp needle, 75/11. Our stabilizer guide covers other items.
Sources
Related
Turn your picture into a stitch file
Upload a logo, a drawing or a name. You see the stitches and a green, yellow or red verdict before you pay, and every machine format comes in one download.